Essential Checklist for Cleaning Every Room Before You Move
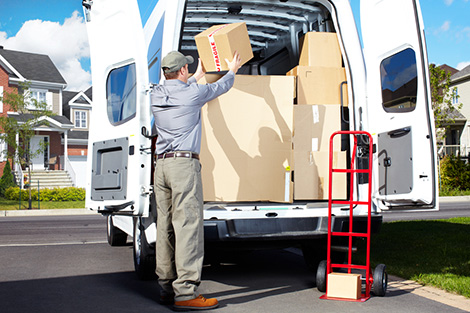
Moving to a new home is an exciting journey, but preparing your old place for the next occupants is a responsibility you shouldn't overlook. Whether you are leaving a rented apartment or selling your house, following a comprehensive cleaning checklist can help you leave every room spotless. In this article, you'll find an essential guide to cleaning each room before you move, along with pro tips for efficient and thorough results.
Why Cleaning Before You Move Out Matters
Cleaning every room before moving is more than common courtesy. If you are a tenant, your security deposit likely depends on the property's condition. Even for homeowners, a sparkling clean house can make the sale process smoother or provide peace of mind to the new owners. Thorough cleaning removes allergens, dust, and potential hazards that may have accumulated over time.
- Satisfy your landlord: Most leases require a deep clean before vacating.
- Boost your property's value: Clean homes photograph and sell better.
- Create a welcoming environment: For the next residents, leaving a clean slate is considerate and responsible.
General Cleaning Supplies You'll Need
Before starting your move-out cleaning, gather all essential cleaning supplies. Having the right equipment streamlines your checklist and prevents unnecessary interruptions.
- All-purpose cleaner
- Disinfecting sprays and wipes
- Glass cleaner
- Broom, mop, and vacuum cleaner
- Scrub brushes and sponges
- Microfiber cloths
- Gloves and masks (if using strong chemicals)
- Trash bags
- Step ladder (for hard-to-reach places)
Step-by-Step Essential Checklist for Cleaning Each Room Before You Move
1. Kitchen
- Empty all cabinets and shelves. Remove crumbs, dust, or sticky residue using a mild detergent and a damp cloth.
- Clean appliances inside and out: Don't forget the oven, stovetop, microwave, refrigerator, and dishwasher. Remove food debris, stains, and grease, especially in and behind appliances.
- Countertops and backsplashes: Disinfect with an appropriate cleaner and ensure all spots and stains are removed.
- Sink and faucets: Scrub away limescale and water spots. Shine the faucet and handles with a gentle polish or vinegar solution.
- Floors: Sweep and mop thoroughly, paying special attention to corners and beneath movable appliances.
- Trash: Remove all trash, clean the bin, and disinfect the area around it.
- Pantry: Wipe shelves and discard expired items; sweep the floor.
2. Bathrooms
- Clean and disinfect the toilet: Scrub the bowl, tank, and exterior. Don't forget under the rim and behind the seat.
- Shower and bathtub: Remove soap scum, mildew, and hard water stains. Pay attention to shower doors or curtains.
- Sink and countertop: Disinfect surfaces and polish taps and handles.
- Mirrors and glass: Use glass cleaner for a streak-free shine. Wipe any shelves or medicine cabinets.
- Cabinets and organizers: Empty, wipe out, and disinfect all storage spaces.
- Floors: Sweep and mop using a bathroom-safe cleaner.
- Exhaust fans and vents: Remove dust and wipe down with a damp cloth.
3. Living Room and Common Areas
- Dust from top to bottom: Ceiling fans, light fixtures, window sills, and baseboards all collect dust over time.
- Clean windows and glass doors: Both inside and out, as well as the window tracks and frames.
- Vacuum and shampoo carpets: Address stains with spot cleaners or consider professional cleaning for high-traffic areas.
- Sweep and mop hardwood or tile floors: Use the appropriate cleaning solution for the flooring type.
- Wipe down walls and doors: Remove scuffs and fingerprints. Don't forget the doorknobs and light switches.
- Empty and clean closets: Remove all items, vacuum/sweep the floor, and wipe the shelves and rods.
4. Bedrooms
- Remove all personal belongings: Check under the bed and inside all drawers and closets.
- Dust ceiling fans and light fixtures: Use a microfiber cloth or duster and ensure no cobwebs are left behind.
- Clean walls and baseboards: Gently wipe down with a damp cloth to remove smudges and marks.
- Vacuum carpets or rugs: Pay extra attention to edges and under furniture. If needed, steam clean.
- Wash windows and blinds: Clean both inside and out, dust blinds, and wash or vacuum curtains.
- Closets: Wipe shelves, rods, and floors for dust and dirt.
5. Laundry Room
- Wipe down washer and dryer: Remove lint, clean inside the machine (including detergent drawers), and wipe exteriors.
- Clean out lint traps and dryer vents: To reduce fire risk and eliminate dust.
- Shelves and cabinets: Empty and clean inside and out.
- Sweep and mop floors: Remove any spills or residue from laundry detergents and products.
6. Hallways and Entryways
- Dust baseboards and corners: These areas accumulate dirt easily and are often overlooked.
- Clean doors and handles: Wipe down both sides of the entry door, handles, and any glass panels.
- Mirrors and wall fixtures: Polish for a streak-free finish.
- Vacuum or sweep floors and rugs: Ensure no dirt is tracked out or left behind.
7. Garage, Basement, and Storage Areas
- Clear out all personal possessions: Properly dispose, donate, or recycle unwanted items.
- Sweep floors: Remove dust, debris, and cobwebs from floors, walls, and corners.
- Clean shelves and workbenches: Wipe away grease, oil, or dust from any surfaces.
- Check for leaks or spills: Address any oil, paint, or chemical spills safely.
8. Outdoor Spaces (If Applicable)
- Patios, decks, and balconies: Sweep debris, power-wash if necessary, and remove leaves or moss.
- Clean outdoor furniture: Wipe down tables, chairs, and grills.
- Front entry and driveway: Sweep away dirt and cobwebs. Ensure trash bins are empty and clean.
Special Tips to Ensure a Deep Clean Before You Move
- Work from top to bottom: Start with ceiling fans and light fixtures, and end with floors to prevent dust from resettling.
- Deodorize thoroughly: Use baking soda on carpets and in refrigerators to neutralize odors.
- Check nooks and crannies: Light switches, door frames, vents, and under appliances often get missed.
- Remove all nails and wall hooks; fill holes: Restore walls as close to original as possible.
- Leave final touch items for last: Vacuum last as you exit the property to ensure footprint-free floors.
Eco-Friendly Cleaning Ideas
Many move-out cleaning tasks can be accomplished with environmentally friendly products. Use vinegar, baking soda, and lemon for a natural and safe clean, especially on surfaces where kids and pets spend time. These alternatives also help reduce harsh odors compared to synthetic cleaners.
Room-by-Room Cleaning Checklist for Your Move
- Kitchen: Wipe cabinets, clean appliances, scrub countertops, disinfect sinks, and mop floors.
- Bathrooms: Scrub toilets, tubs, and showers, clean mirrors and vanities, and mop floors.
- Bedrooms: Dust surfaces, clean closets, shampoo carpets, wash windows, and remove all items.
- Living Areas: Dust, clean windows, vacuum/shampoo carpets or mop floors, and wipe walls.
- Laundry Room: Clean appliances, empty cabinets, and mop floor.
- Entryways: Dust, clean glass, and ensure a tidy first impression upon exit.
- Storage and Garage: Clear out items, sweep, and clean spills or residue.
What to Check Before Calling Your Move-Out Cleaning Complete
- All personal items are removed from every room
- No trash or garbage left behind
- All surfaces wiped and sanitized
- Floors swept, vacuumed, or mopped according to material
- No marks, scuffs, or stains on walls and baseboards
- Windows and mirrors are streak-free
- Closets, cabinets, and drawers are empty and clean
- Keys, remotes, and manuals for appliances are left as instructed
Additional Move-Out Cleaning Tips
- Schedule enough time: Cleaning an entire property often takes longer than expected. Allocate dedicated days for each stage of your end-of-lease cleaning checklist.
- Work in pairs: Enlist help from friends or family to make the process quicker and more thorough.
- Hire professionals if necessary: For deep stains, carpets, or time constraints, consider a move-out cleaning company for guaranteed results.
Downloadable Essential Move-Out Cleaning Checklist
For your convenience, here's a printable checklist for cleaning every room before you move:
- Empty and clean all rooms
- Detail clean kitchen appliances and cabinets
- Scrub and disinfect all bathrooms
- Dust all surfaces, including fixtures and vents
- Vacuum or mop all floors
- Spot check for any damage or missed areas
- Dispose of trash and unwanted items responsibly

Frequently Asked Questions: Cleaning Before Moving Out
1. What if I run out of time to clean before moving?
If you're pressed for time, focus on high-impact areas: bathrooms, kitchen, and floors. Otherwise, hiring a professional move-out cleaning service ensures the property meets all requirements.
2. Do I have to clean appliances?
Yes! Landlords and buyers expect all appliances to be clean, inside and out. Remember to defrost and clean the freezer and fridge early to avoid water leaks.
3. How should I clean if I am selling my home versus renting?
Both situations require a thorough clean. However, when selling, extra attention to presentation (such as window cleaning and deep carpet cleaning) can raise property value and appeal.
4. Are there items I'm not responsible for cleaning?
Check your lease or sales agreement. Fixtures and built-in appliances are usually included. However, you aren't generally responsible for items not provided with the property (such as a personal washing machine you plan to move).
Conclusion: Make Your Move-Out Stress-Free
A careful, organized approach to cleaning every room before you move is essential for getting your deposit back, boosting property appeal, and leaving on good terms. Use the essential move-out cleaning checklist above to ensure no corner is left unattended. If you're feeling overwhelmed, call in professional cleaners for peace of mind. Happy moving!
Don't forget: A little extra effort now saves time, money, and stress later. Good luck with your move!